
Hey there, garden lovers! Donna here, ready to share one of my favourite ways to turn kitchen scraps into a flourishing garden treasure. Today, we’re diving into the wonderful world of collard greens—those vibrant, sturdy leafy vegetables that come from the brassica family, just like cabbages. If you’ve ever thought growing your own greens was tricky or that you need acres of space, think again! I’m going to show you how to use a simple container, some soil, and yes, even your kitchen scraps, to grow big, healthy collard greens that will bring colour and flavour to your garden and your plate.
These greens are not only a staple in American kitchens but also a fantastic addition to any garden, especially if you love fresh, homegrown produce. They grow big, they’re tough in texture, and they never get mushy like some other greens. Plus, planting them is a breeze! I’ll walk you through the entire process from preparing your container with stones and newspaper to keep the soil just right, to chopping up kitchen peelings for natural nourishment. By the end of this post, you’ll have all the tips and tricks you need to plant your own coloured greens and watch them thrive.
Choosing the Right Container and Preparing It for Planting
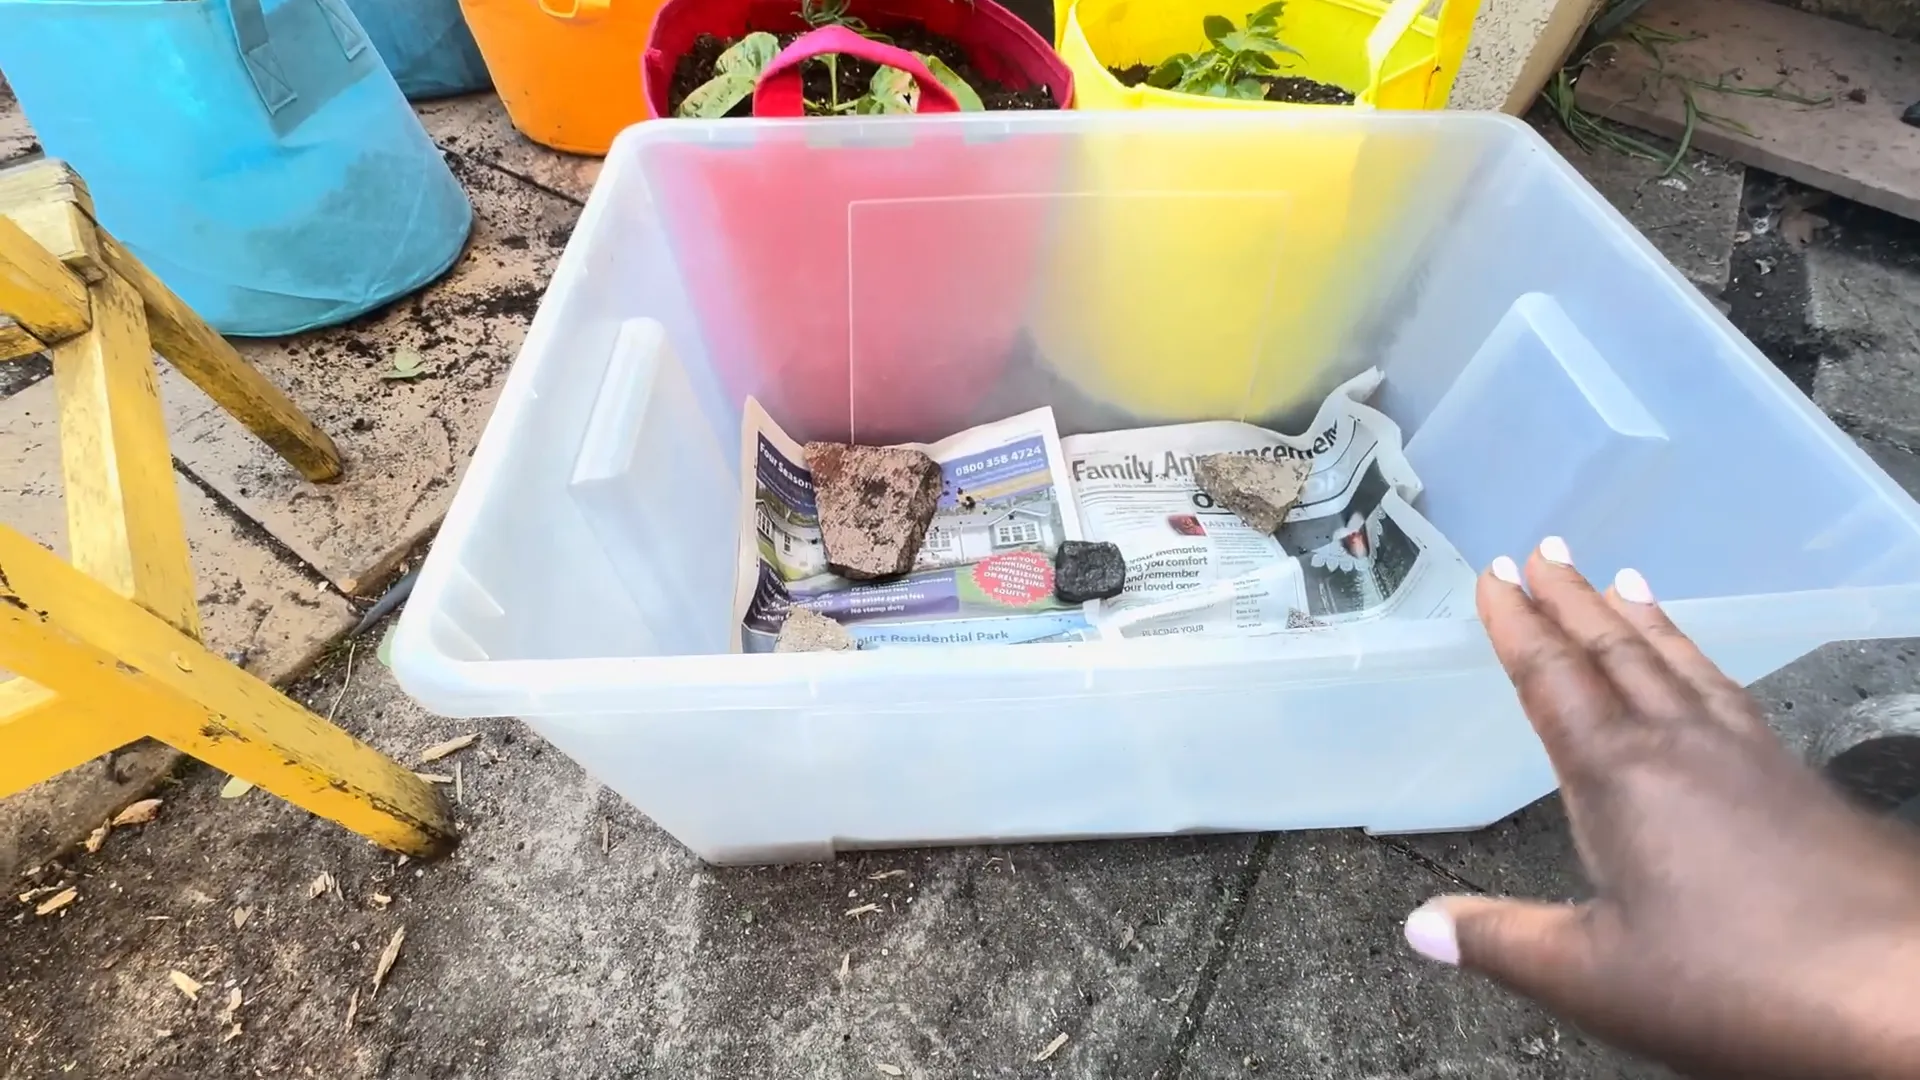
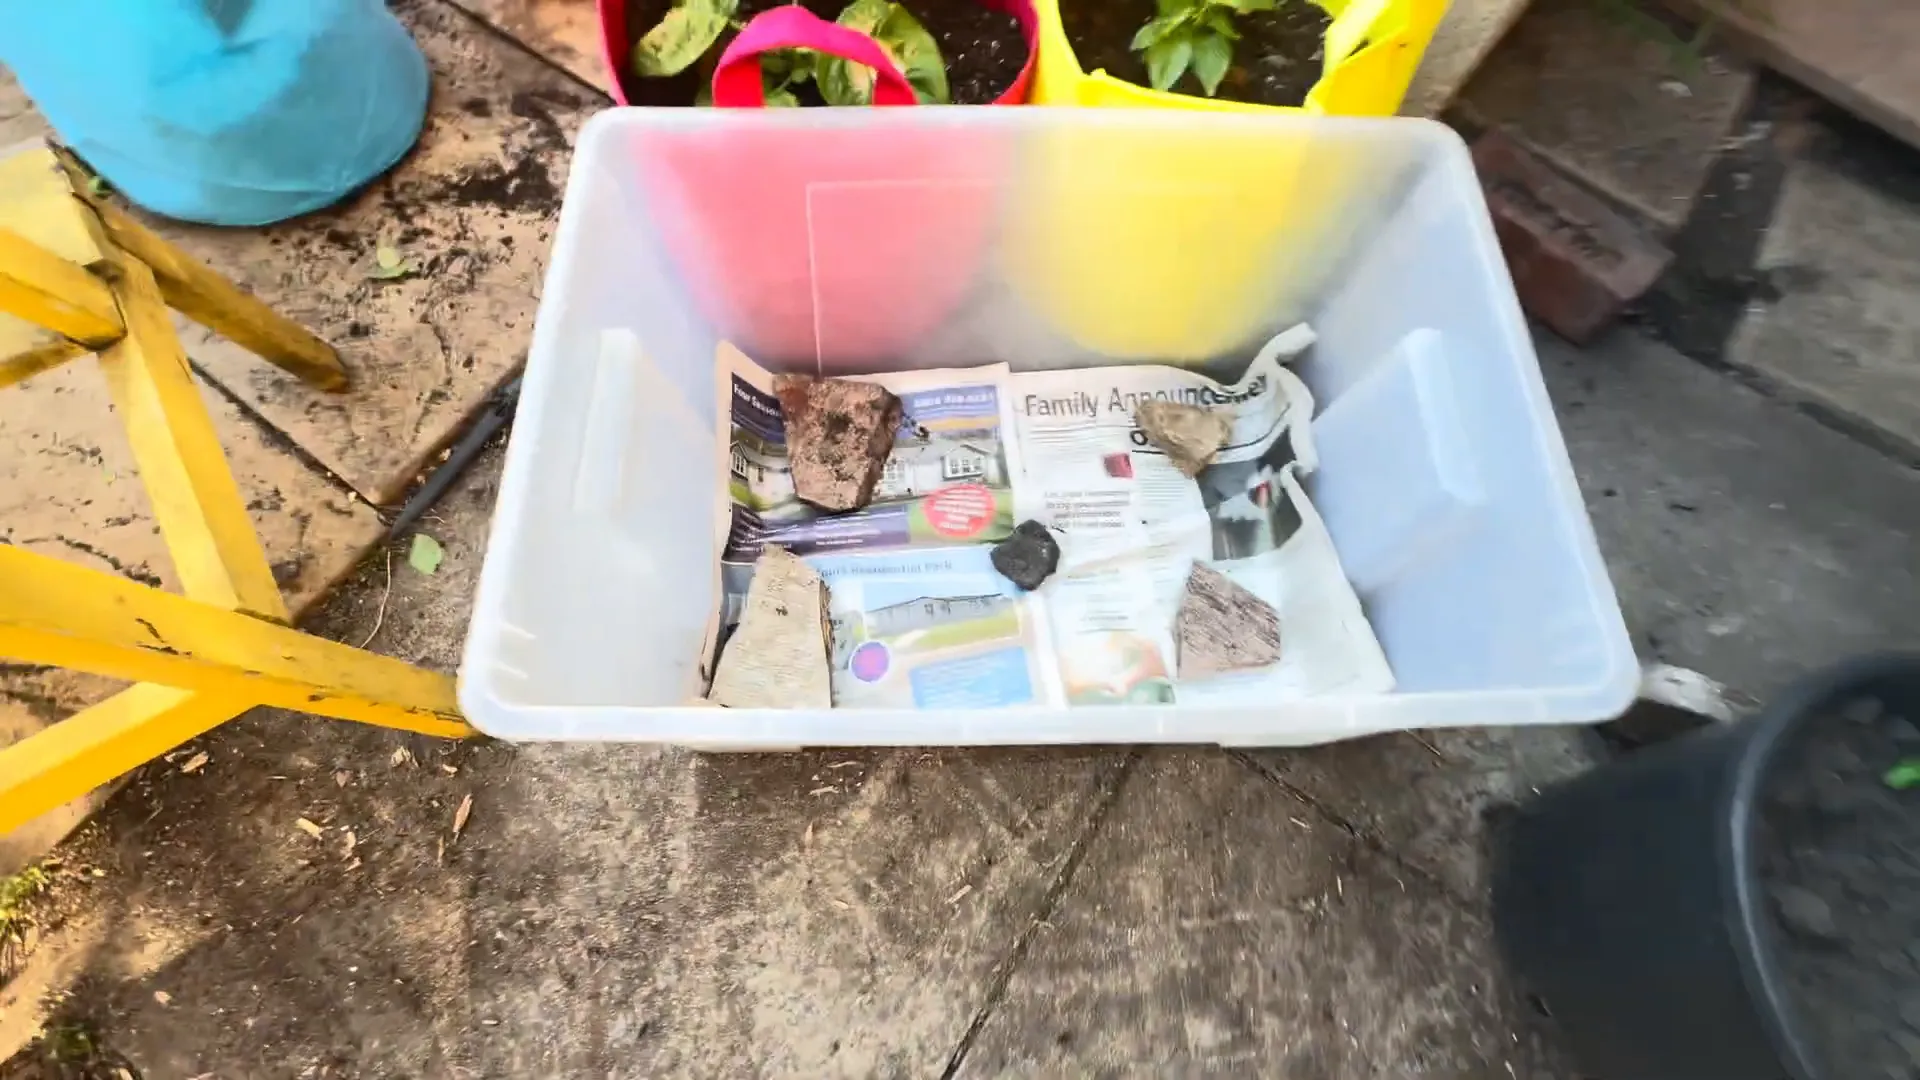
When it comes to growing collard greens, size matters. These plants can grow quite large, so you’ll need a container that gives their roots plenty of room to spread out and grow strong. I like to use a fair-sized container that’s roomy enough to hold at least a few plants comfortably. What you want is a container with drainage holes at the bottom, to prevent waterlogging and keep the roots healthy.
Here’s a neat trick I use to keep the soil moist and well-drained: first, I place some stones at the bottom of the container. This layer acts like a drainage bed, allowing excess water to flow through easily. Then, I add a layer of newspaper over the stones. This might sound unusual, but the newspaper helps retain moisture without letting the soil get soggy. It’s a simple, eco-friendly way to create the perfect base for your greens.
Adding Kitchen Scraps for Natural Fertilizer
One of the things I love about gardening is turning kitchen scraps into garden gold. Instead of tossing vegetable peelings and other scraps in the bin, chop them up and add them to your container before planting. This not only reduces waste but also enriches the soil as the scraps break down, providing your greens with essential nutrients.
Before you add your scraps, make sure to remove any seeds—like pepper seeds—that might sprout into unwanted plants. Even if some do grow, you can easily pull them out later. I like to chop everything finely so it breaks down more quickly in the soil. Then, I spread the chopped scraps in the centre of the container, right on top of the newspaper and stones.
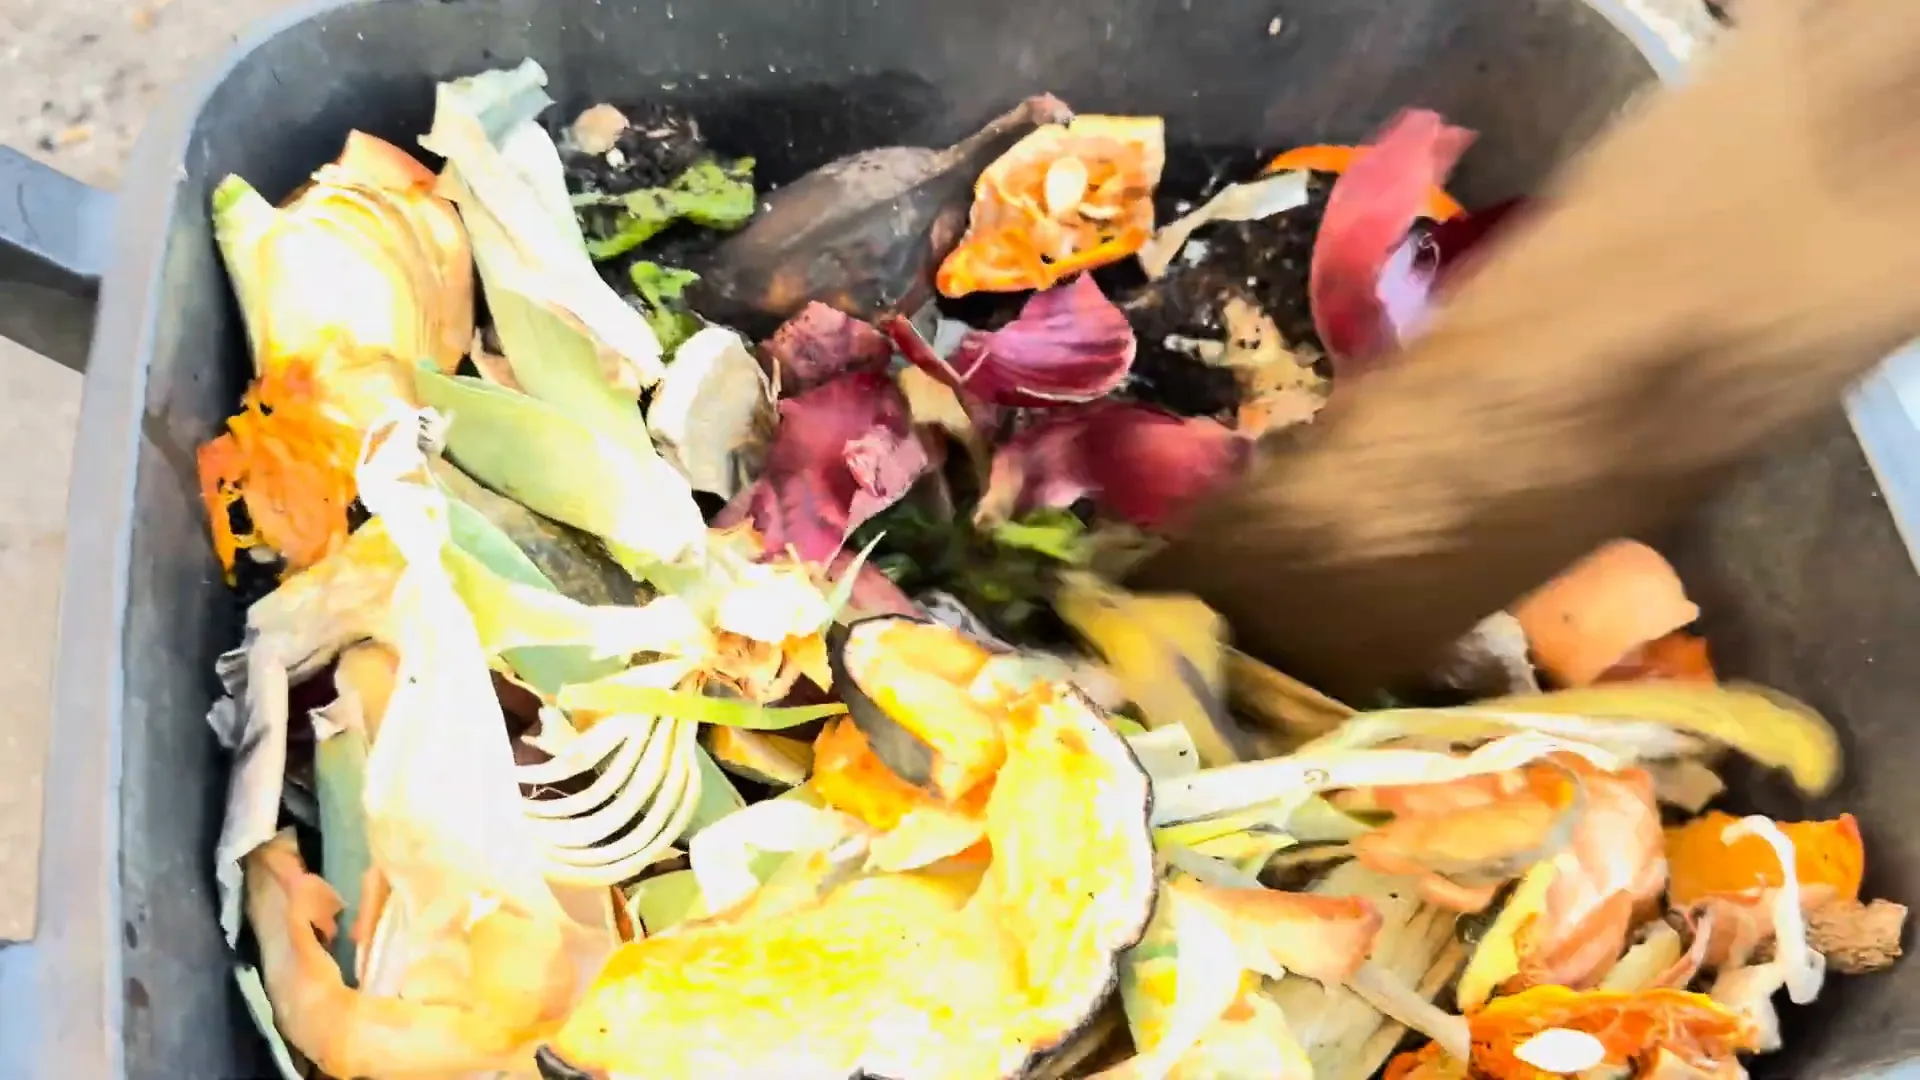
Once the scraps are in place, I cover everything with a good layer of soil. If you have some farmyard manure, adding a handful now can give your plants an extra nutrient boost. Later on, you can supplement with a nice fertilizer for even better growth.
Planting Your Collard Greens: Selecting and Preparing Seedlings
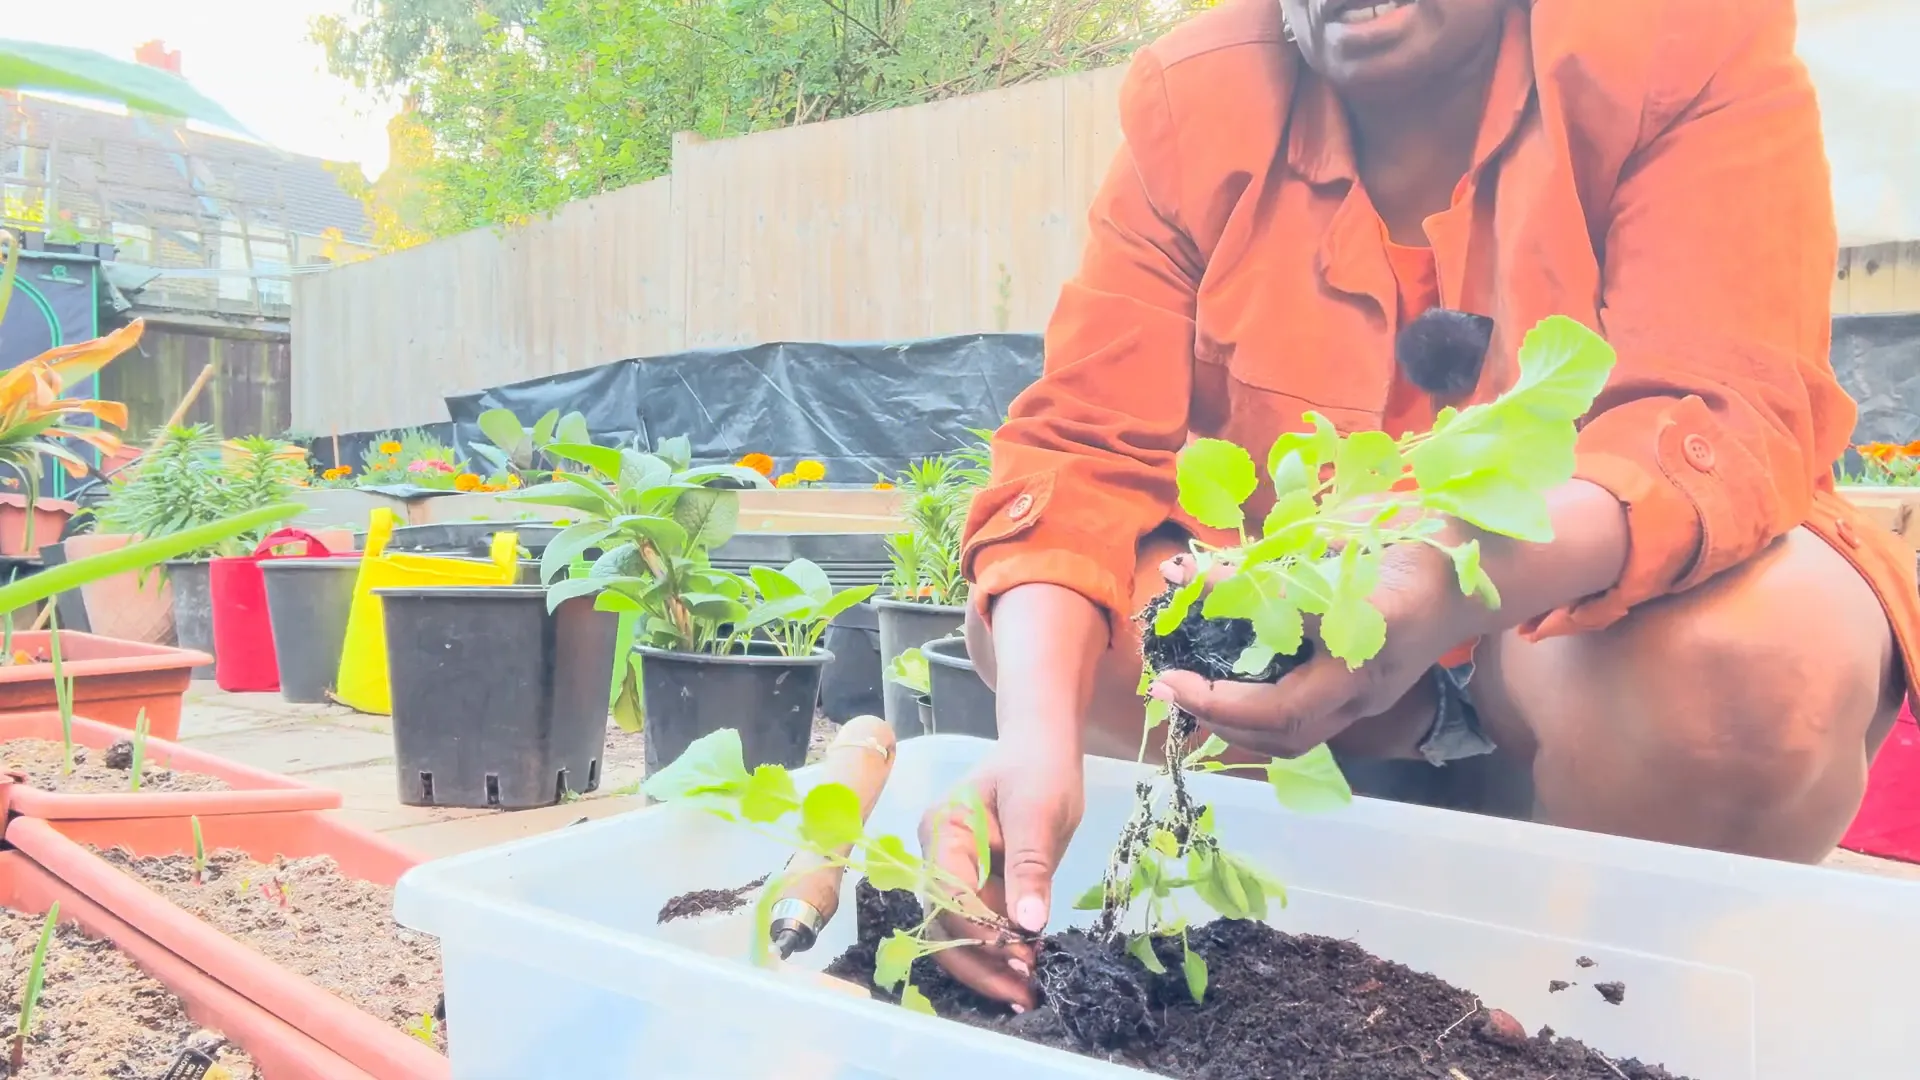
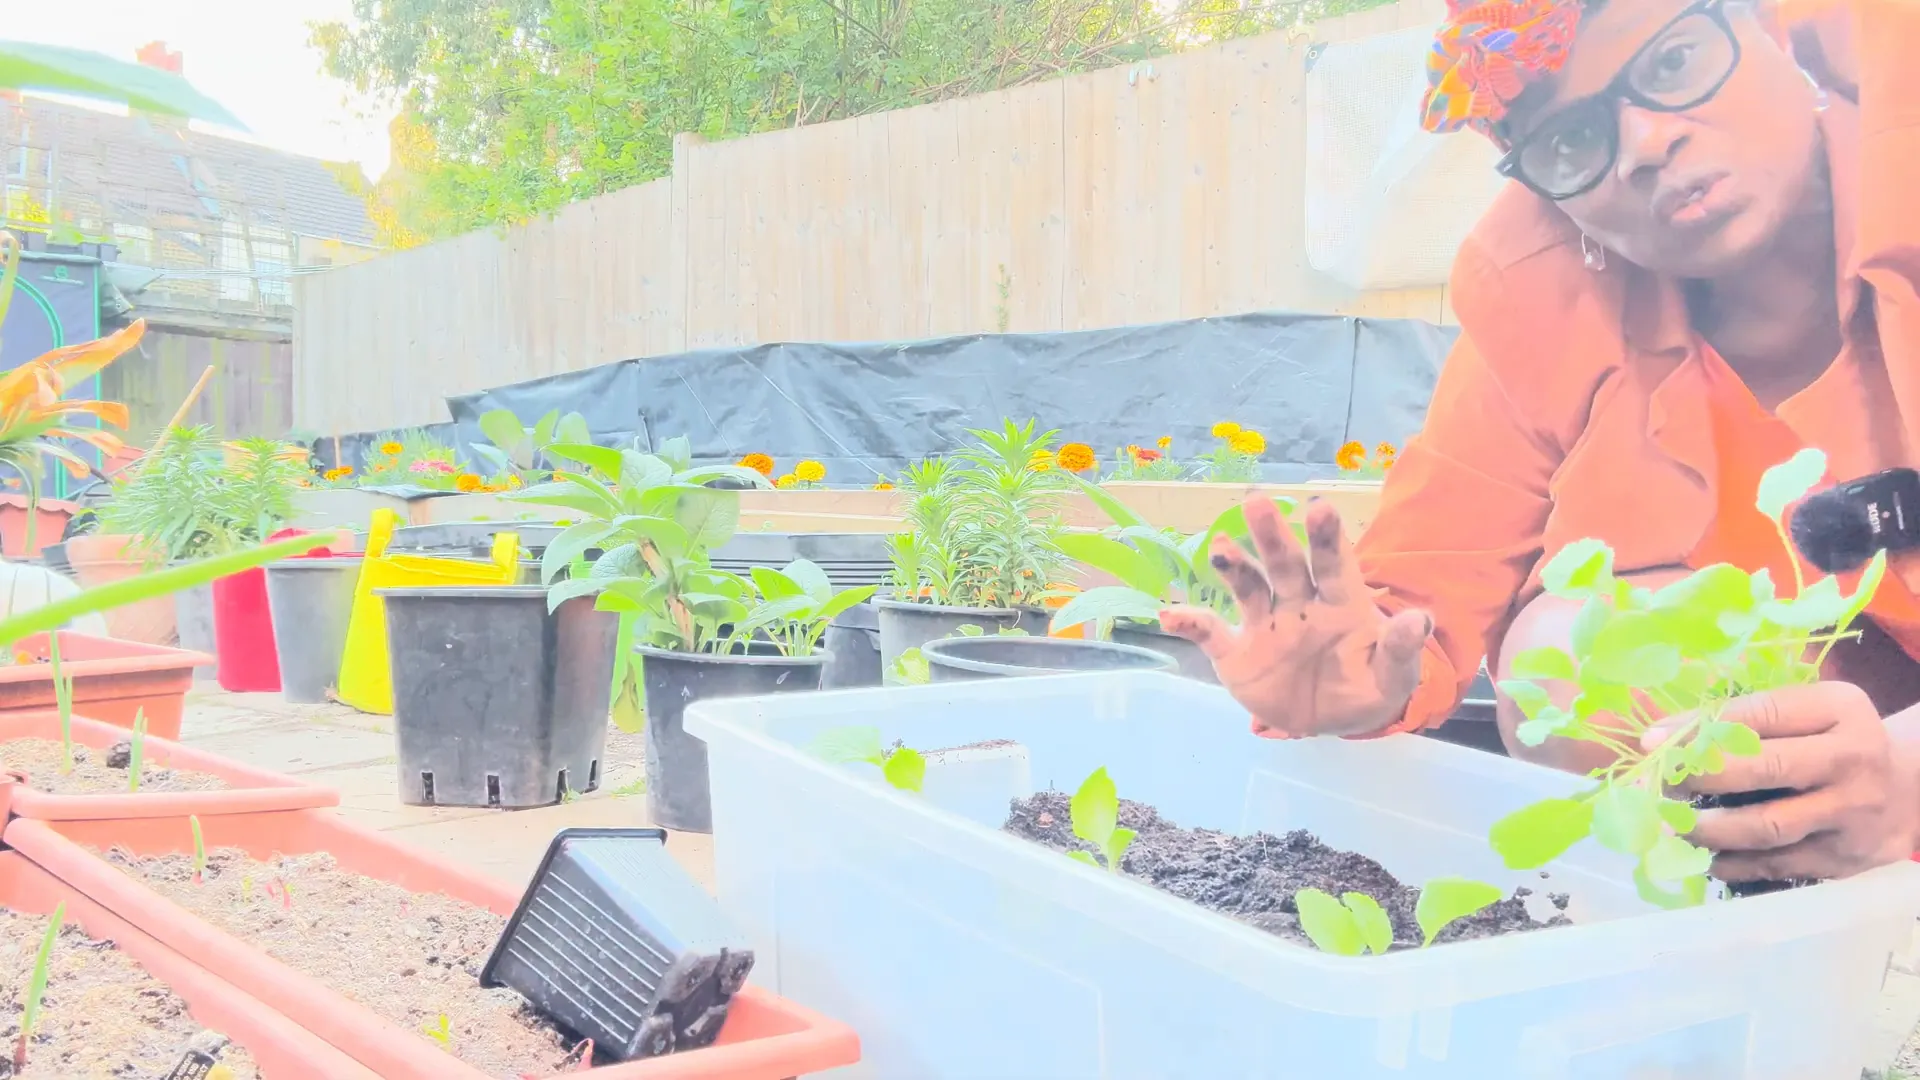
Now comes the fun part—planting your greens! I start by multi-sowing a lot of seeds, which means scattering many seeds to germinate together. It’s a bit of a gamble, but I like to pick out the strongest seedlings once they sprout. For planting in a container, I recommend choosing two or three of the healthiest seedlings to give them room to grow big and strong.
Collard greens are tough and hearty, much tougher than other greens like callaloo, which tends to get mushy when cooked. These greens hold their texture beautifully and taste fantastic when seasoned with tomatoes and onions. It’s no wonder they’re so popular in American cooking! When selecting your seedlings, look for the biggest, healthiest ones and gently separate them from the rest.
Keep in mind that coloured greens belong to the brassica family, just like cabbages. Sometimes you might spot a cabbage seedling mixed in with your greens. Don’t worry about it—if it grows, it grows! You can always remove any unwanted plants later to give your greens more space.
How to Plant Your Seedlings in the Container
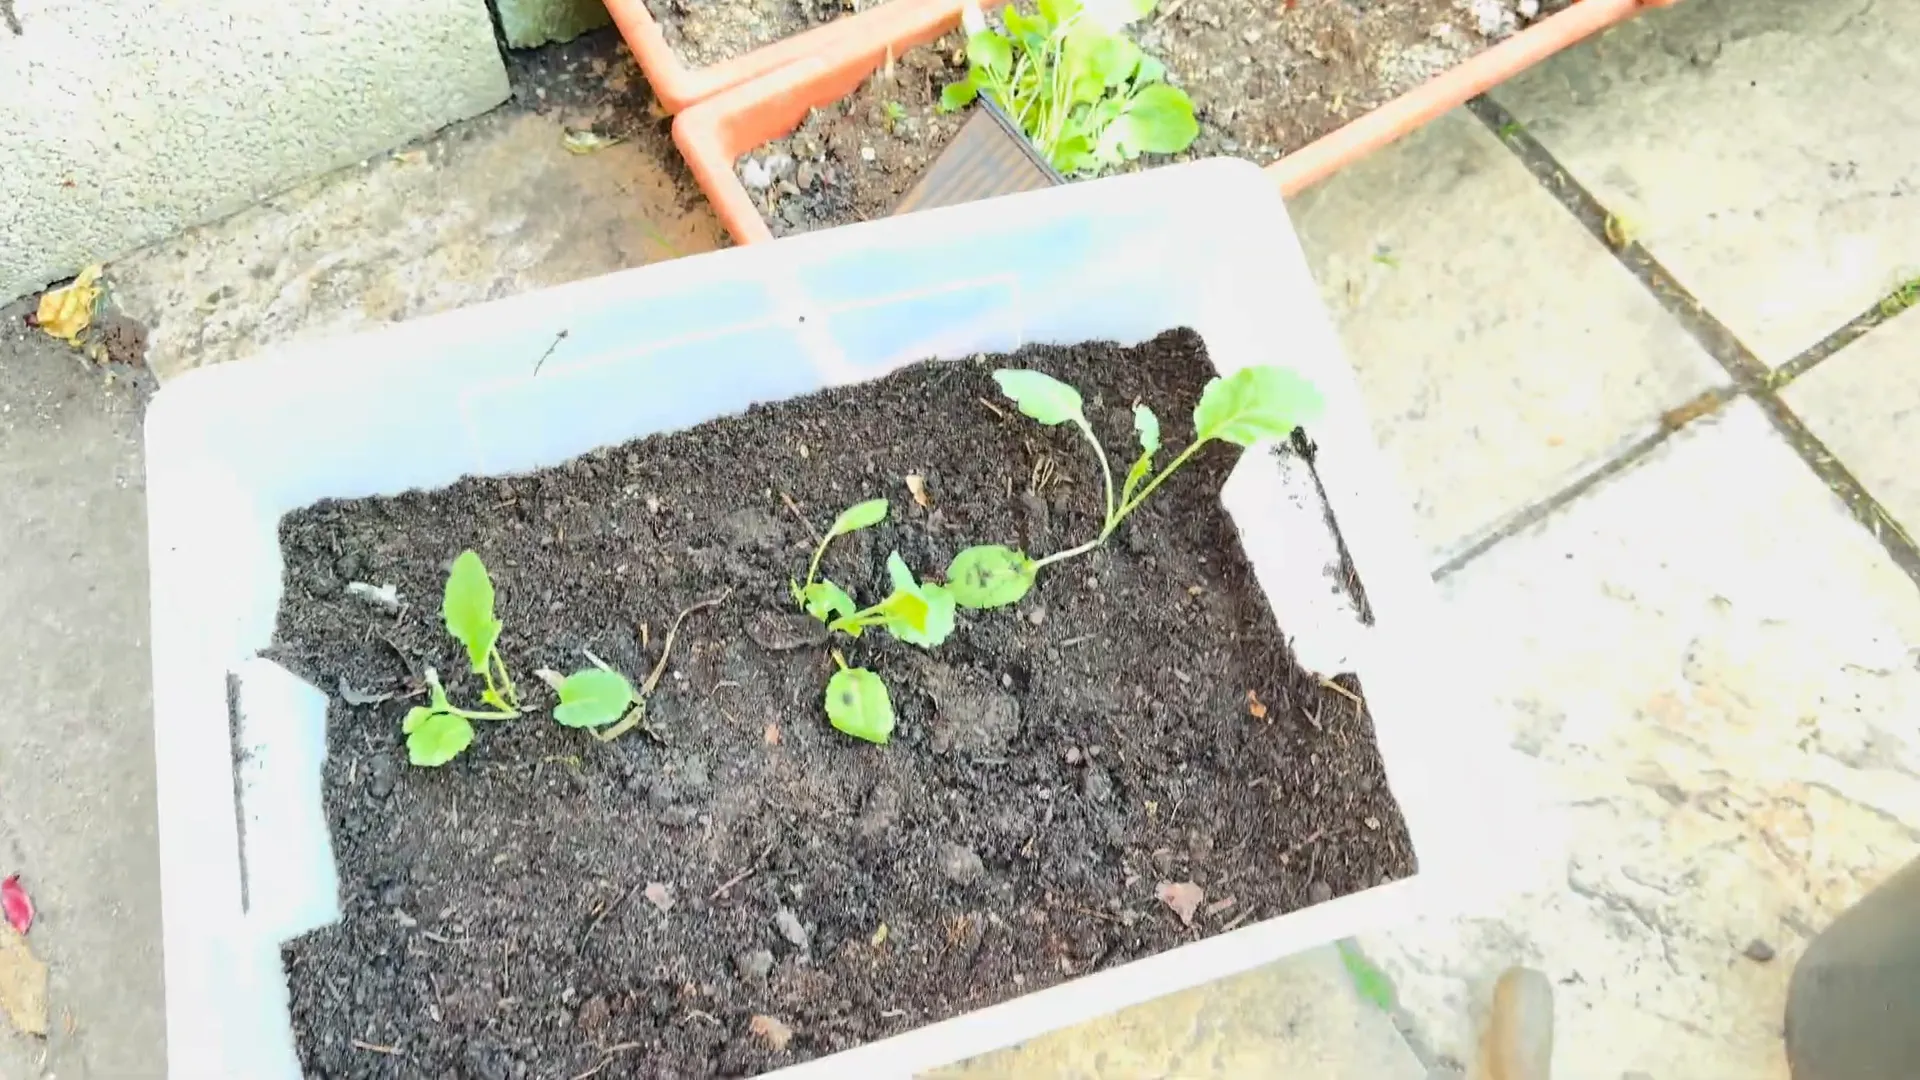
To plant, dig small holes in the soil where your seedlings will sit comfortably. I like to plant three seedlings spaced evenly: one in the middle and two on opposite corners of the container. Gently place each seedling into its hole, making sure the roots are well covered with soil. Press down lightly around the base to secure them in place.
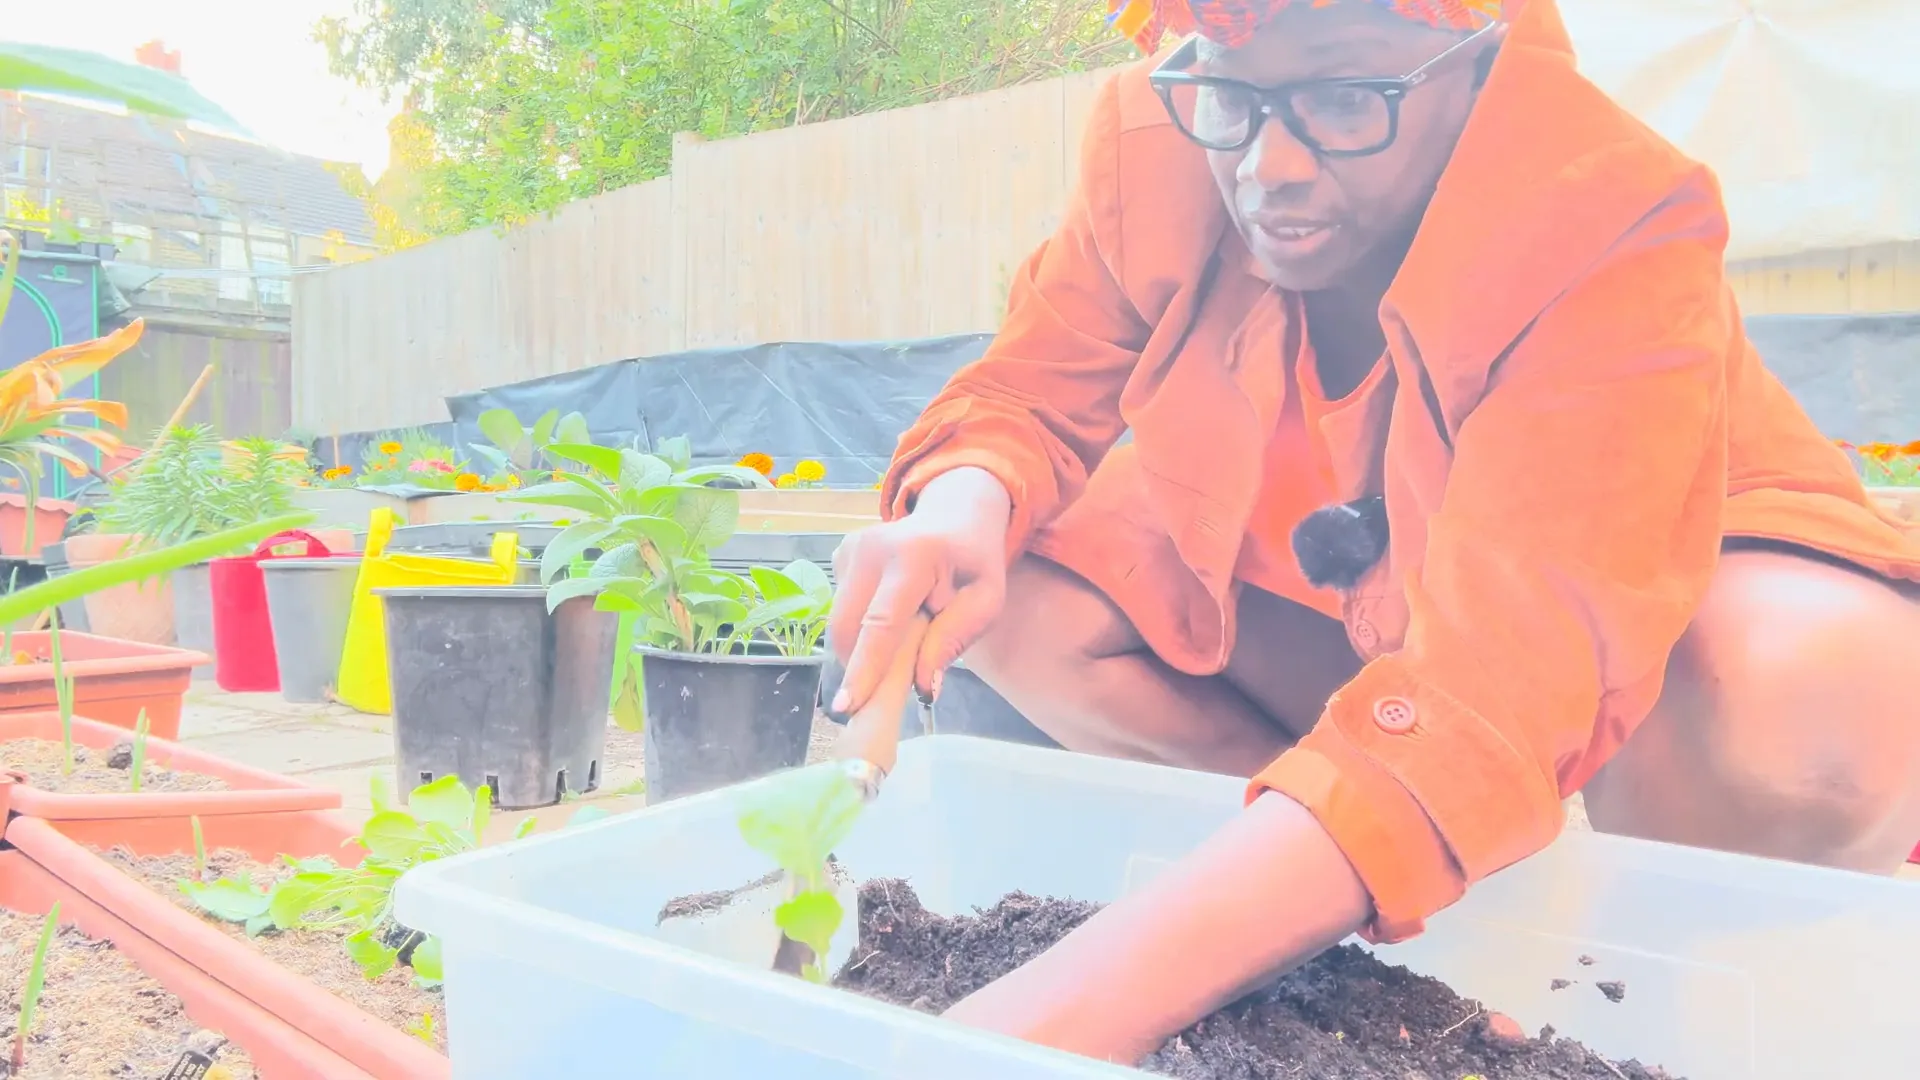
Once all your seedlings are planted, it’s time to water them in. Give them a good soak to settle the soil around the roots and provide moisture for their first days in their new home. Watch as they begin to grow and thrive—it’s a joyful sight that brings a smile to my face every time.
Protecting Your Greens and Encouraging Healthy Growth
As your greens grow, they’ll attract all sorts of insects and critters. While collard greens aren’t as vulnerable as cabbages, it’s still a good idea to protect them from pests. One way to do this is through companion planting—placing certain plants nearby that naturally deter insects.
I recommend planting marigolds around your container. Marigolds are fantastic at keeping pests away, helping your greens stay healthy without the need for harsh chemicals. Nature provides us with wonderful allies if we know where to look!
Also, keep an eye out for any weeds that might try to sneak in and choke your plants. Use a garden fork or your hands to carefully remove these weeds, especially the tiny ones strangling your greens’ growth. A tidy garden is a happy garden, and your plants will thank you for the extra care.
Why Growing Your Own Collard Greens is Worth It
Growing your own collard greens is not just about having fresh vegetables on hand—it’s about the joy of nurturing life from seed to harvest. Watching those first shoots break through the soil fills me with pride and happiness. Plus, you get to enjoy the freshest, most delicious greens possible, with the satisfaction of knowing you grew them yourself.
These greens are versatile in the kitchen too. Their firm texture holds up well in stews, sautés, and even raw salads. Season them with your favourite tomatoes, onions, and spices for a taste that’s as vibrant as their leaves.
Easy to Grow and Not Too Late to Start
One of the best things about collard greens is how easy they are to grow. Whether you’re a beginner or an experienced gardener, they’ll reward you with big, beautiful leaves without too much fuss. And don’t worry if you’re starting a bit late in the season—you can plant collard greens now and still get a great harvest.
So, grab a container, gather your soil, stones, newspaper, and kitchen scraps, and get planting! You’ll be amazed at how quickly those greens grow and how much joy they bring to your garden and kitchen.
Final Tips for a Thriving Container Garden
- Use containers with drainage holes to avoid waterlogging.
- Layer stones and newspaper at the bottom to keep soil moist but well-drained.
- Chop up kitchen scraps and add them to your soil for natural nutrients.
- Select strong, healthy seedlings and plant two to three per container.
- Water thoroughly after planting and keep an eye on moisture levels.
- Plant marigolds nearby to deter pests naturally.
- Regularly weed your container to prevent competition for nutrients.
- Enjoy the process and celebrate every new leaf that appears!
There you have it, my friends—a simple, sustainable way to grow big, beautiful collard greens right at home. I hope this inspires you to stop wasting those food scraps and start turning them into garden magic. Happy planting and lots of love from my garden to yours!
🌿 Want more tips like this? Check out my YouTube channel DW Eats for more homestyle gardening, cooking, and feel-good vibes. Or jump into this episode right here and leave a comment and a like!


0 Comments